
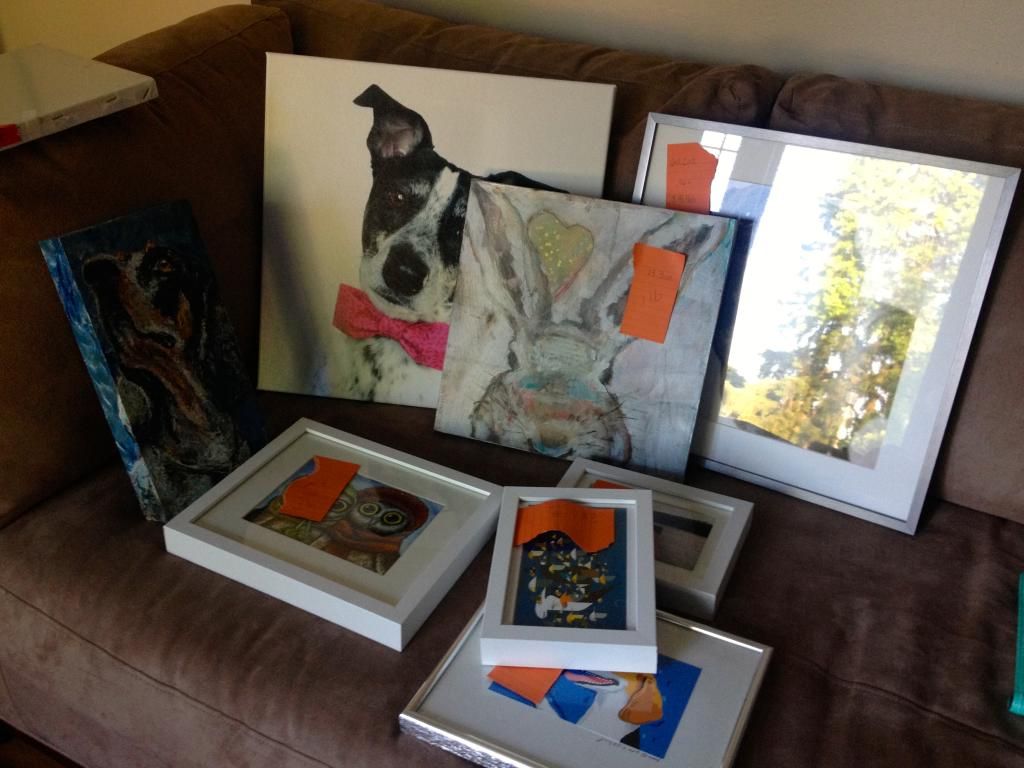
The first step was to make sure I had a solid game plan for what artwork was going in what frame. Then came the painting. Oh the painting. I should have sanded a couple of the frames before hand but at that point I wasn't prepared to add an additional, all be it important, step in the process of getting all this stuff off the ottoman in the craft room. I decided a while ago that I was only going to use white or grey/silver frames for some continuity. A couple cans of spray paint later and my backyard looked like this.

Then came the acrylic. Oh the acrylic. So I had a couple square frames from Goodwill that didn't have any glass but I really needed to use them cuz they are the perfect size for two pictures I have. How hard can it be to fix that? I stopped at my local Menards and grabbed a couple pieces of acrylic and a hand cutter. I decided on acrylic instead of glass cuz it seemed safer and cutting glass on a straight line kinda scares me. I even thought enough to buy the anti glare kind that the display said was good for frames. WRONG! I cut the pieces, which took a little trial and error, and when I was ready to put them in the frame I pealed off the protective film to find that anti glare really means frosted. What the H E double hockey sticks! So then came another trip to Menards and another piece of acrylic. This one I made sure was completely clear before leaving the store. I cut it into the two pieces for the frames in question but then I broke one of the pieces trying to jam it into the frame. (I had cut it just a hair too big. Lesson: Don't try to force acrylic with a hammer.) I barely had enough left of the sheet to cut a piece big enough for the second frame. I was NOT going back to the hardware store.
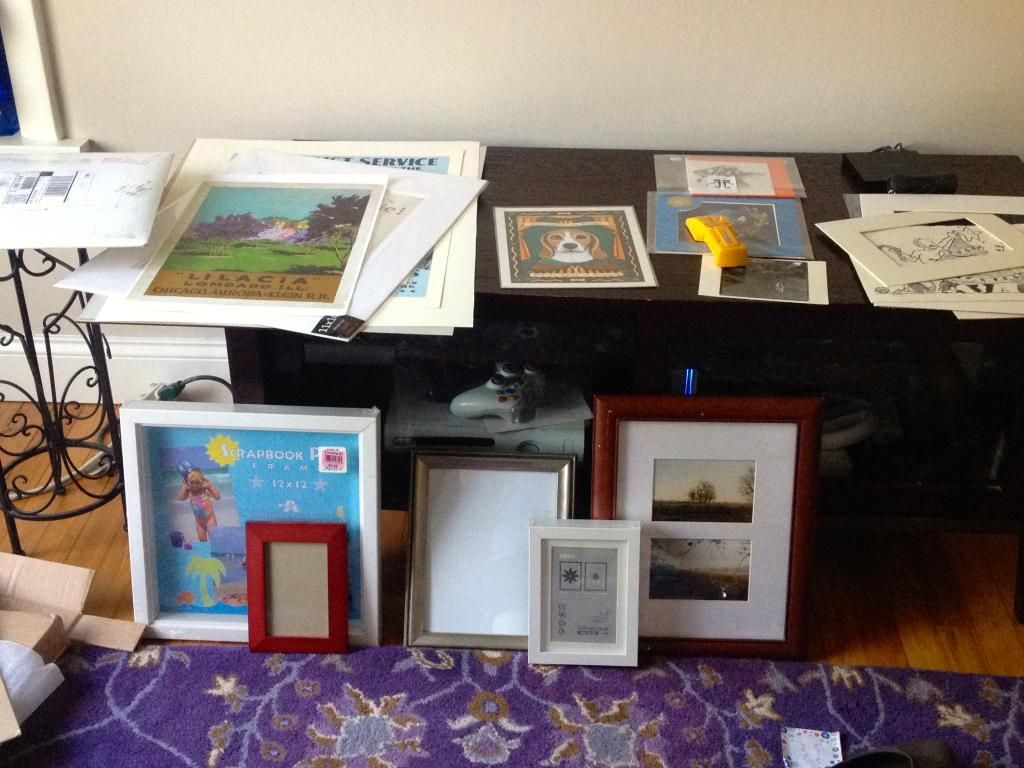
So I had all the frames assembled, sitting in the living room, staring at me. Daring me to actually put them on the wall. I did a little trial run on the floor and then got to hanging. I used a combination of 3M hooks and good old-fashioned nails. This part took a lot longer than I expected because I actually used a level and measured where each nail needed to go. If you are going to undertake a project like this I suggest getting one of these handy picture hanging tools to make it easier. My other tip is to add little felt dots to the bottom two corners of frames. This keeps them from going out of level as easily and allows for airflow.
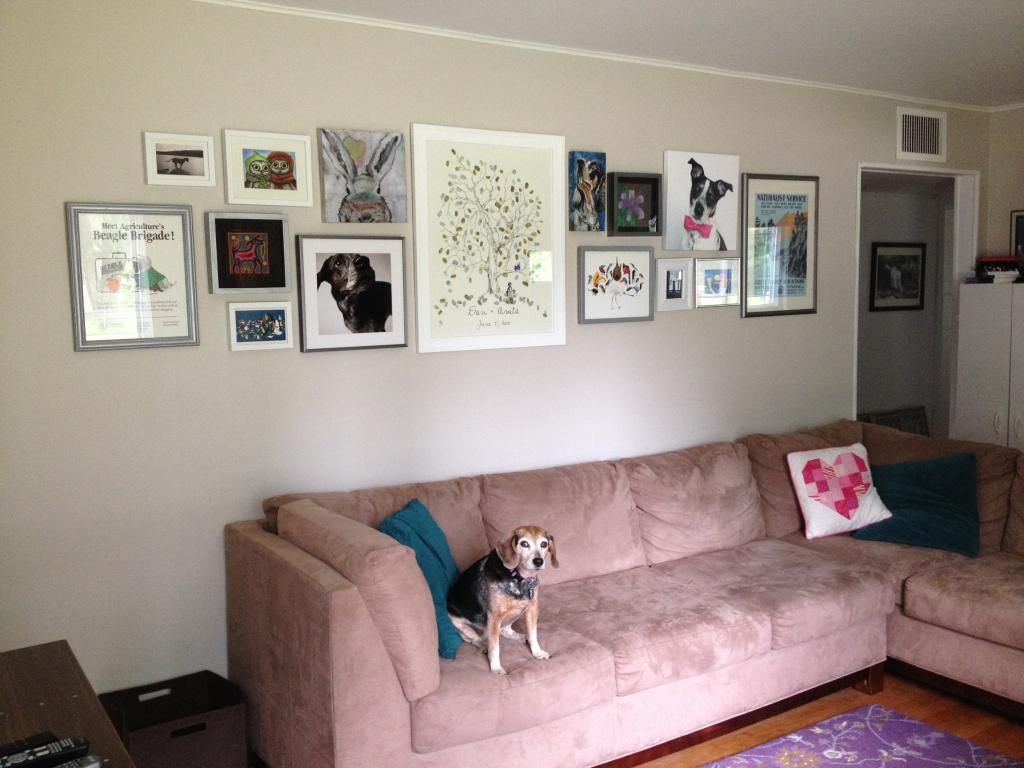
TADA!
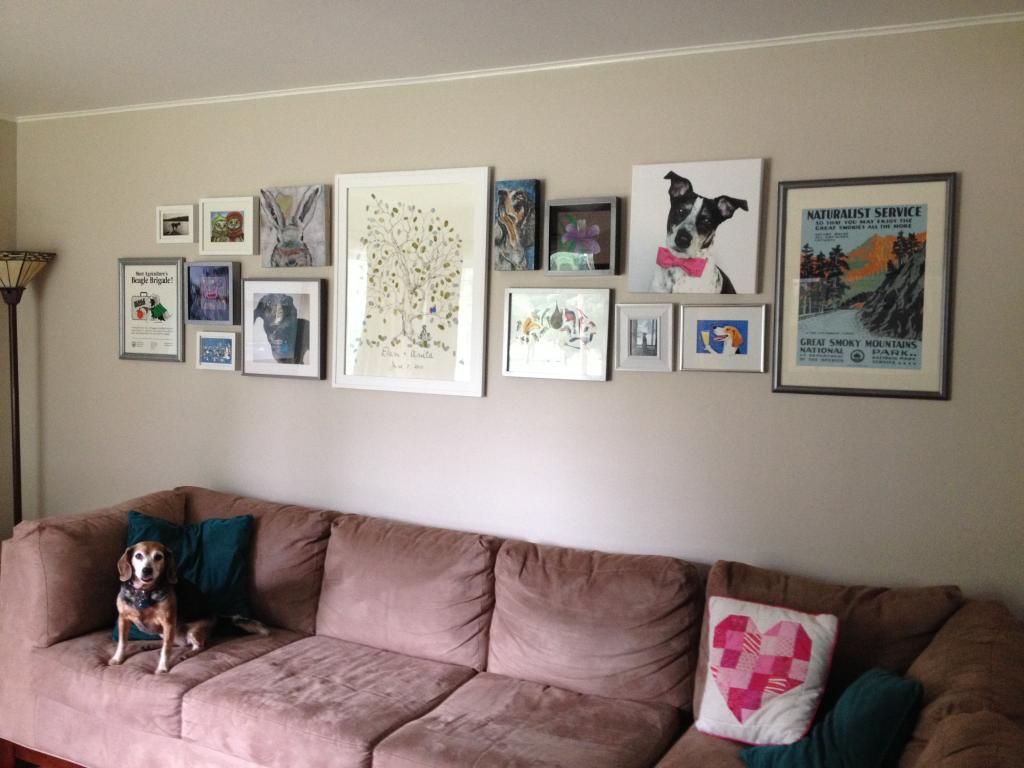 |
| OMG look at Gider's tongue sticking out! |
It did take much longer than expected but I love the end result. That tree drawing in the middle is actually from our wedding. I even had a few pieces that didn't fit so they are going up in the craft room. Stay tuned for my next big reveal. I'm widdiling down that WIP list faster than you can say Rhinestone Beagle.
Craft on!
Anita
Craft on!
Anita
0 comments:
Post a Comment